Put Windows to sleep from Home Assistant

Prerequisites
- OpenSSH server needs to be installed on the Windows PC. If it’s not, learn how to install it.
- An SSH keypair dedicated to Home Assistant. If you don’t have one, learn how to create one.
- Wake on LAN is already set up for turning on the PC. If it’s not, learn how to set it up. Note that Wake on LAN usually requires a wired connection to the PC, but sleeping using this method does not.
Step 1: Configure the OpenSSH server on Windows
This will lock down OpenSSH to require a key for authentication and change the SSH shell to PowerShell.
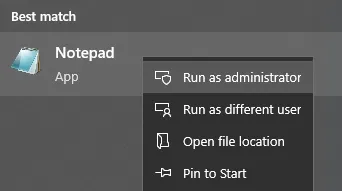

- Run Notepad with administrator privileges. I usually just search for it in the Start menu and then right-click on it and choose “Run as administrator”
- Open the SSH server configuration file:
C:\ProgramData\ssh\ssh_config. You will probably need to change the file type to “All files” at the bottom right of the file open dialog to see the configuration file. - Look for the line that says
PasswordAuthentication. If it has a#before it, remove it. If it saysyesafter it, change it to sayno. The final line should be:PasswordAuthentication no. - Save the file
- Run Command Prompt or PowerShell as an administrator and execute
New-ItemProperty -Path "HKLM:\SOFTWARE\OpenSSH" -Name DefaultShell -Value "C:\Windows\System32\WindowsPowerShell\v1.0\powershell.exe" -PropertyType String -Force. This will make PowerShell the default shell for incoming SSH connections, which is required to run the sleep command we’re using here. - Restart the OpenSSH server: search in Start for “Services”, scroll down to “OpenSSH SSH Server”, and click Restart. If the server fails to start, double-check your configuration file. If you want to reset everything, copy the default file from
C:\Windows\System32\OpenSSH\sshd_config_default.
Step 2: Allow authentication with the public key
This step depends on whether the user you are logging into on Windows is an administrator or not.
For more information, check out the Microsoft OpenSSH key management documentation.
For administrators
- Use Notepad as an administrator to copy the text of the public key file into
C:\ProgramData\ssh\administrators_authorized_keys(create the file if it doesn’t exist). - Use Command Prompt or PowerShell as an administrator to run
icacls.exe "C:\ProgramData\ssh\administrators_authorized_keys" /inheritance:r /grant "Administrators:F" /grant "SYSTEM:F"to protect the file. If the file is not protected, OpenSSH will not read it.
For standard users
Copy the text of the public key file to C:\Users\<username>\.ssh\authorized_keys (create the file if it does not exist).
Step 3: Give Home Assistant the private key
Copy the private key file to your Home Assistant configuration directory. I named mine ssh_id but you can name it anything.
Then run chmod 600 ssh_id (replacing ssh_id with the path to your private key file) to protect it. Like OpenSSH on Windows, OpenSSH on Linux will not use keys that don’t have secure file permissions.
Step 4: Edit your Home Assistant configuration
Add the following shell_command, replacing USERNAME and PC_LAN_IP_ADDRESS with the correct values (and optionally renaming the service from suspend_pc, especially if you have multiple PCs to suspend), and /config/ssh_id with the path to your private key file.
shell_command:
  suspend_pc: >-
    ssh -i /config/ssh_id -o 'StrictHostKeyChecking=no' USERNAME@PC_LAN_IP_ADDRESS
    '[System.Reflection.Assembly]::LoadWithPartialName("System.Windows.Forms");
    [System.Windows.Forms.Application]::SetSuspendState([System.Windows.Forms.PowerState]::Suspend, $false, $false);'
configuration.yaml
Then edit your Wake-on-LAN configuration to add turn_off:
switch:
  - platform: wake_on_lan
    name: My PC
    mac: PC_MAC_ADDRESS
    host: PC_LAN_IP_ADDRESS
    turn_off:
      service: shell_command.suspend_pc
configuration.yaml
Now restart Home Assistant and it should work. You can test it by going to Developer Tools → Services and calling your new service. If it doesn’t work, continue reading for help.
If you have Google Assistant or another voice assistant set up, expose the switch and you can say “Okay Google, turn on/off my PC”.
Troubleshooting
The first place to look if the service isn’t working is the Home Assistant log. Go to Configuration → Logs and enter shell_command in the search bar. If there are no entries, the problem is between your input and the shell command integration, which is beyond the scope of this post. If there’s an entry where it failed to run the SSH command, continue reading below to learn how to debug it.
The easiest way to figure out why it’s failing to run an SSH command is by running it yourself. From the server running Home Assistant (if you’re running Home Assistant in Docker, remember to docker execinto your container), run ssh -i PATH_TO_ssh_id USERNAME@PC_LAN_IP_ADDRESS. If that command shows a permission denied error, make sure you have put the right public key in the right place and then reapply the file permissions on the relevant authorized_keys file.
If you can connect and authenticate but the command won’t run, make sure PowerShell is the default shell for SSH as described above. In fact, the reason I’m writing this is to be a guide to myself next time I reinstall Windows because I forgot this step on this most recent reinstall and spent hours debugging it.
If Home Assistant can wake the PC but it always shows the switch being off, Windows Firewall is probably blocking pings. To fix this:
- Open “Windows Defender Firewall with Advanced Security” from the Start menu
- Find the rule named “Core Networking Diagnostics - ICMP Echo Request (ICMPv4-In)” for your current network type
- Double-click it and make sure Enabled is checked and “Allow this connection” is chosen
Comments ()